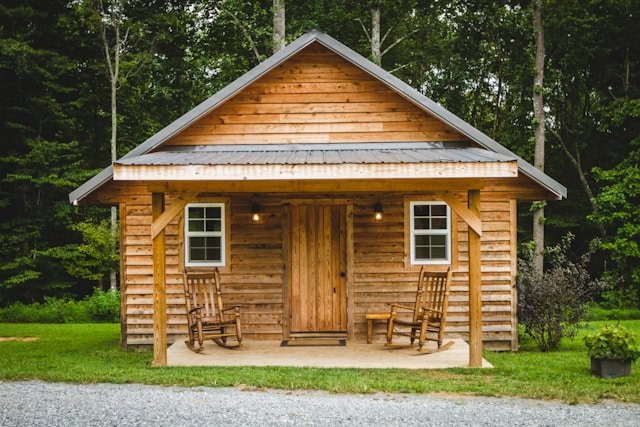
How to Build an Affordable Log Cabin: Simple Guide for First-Time Builders
Building a log cabin won’t break your bank if you do it yourself. Our small home cost roughly $3000 to build because we used trees from our forest that needed thinning. Professional contractors would have charged over $1,000 just to roof the structure, but we finished everything ourselves using simple tools and determination.
The log cabin’s construction challenged our stamina more than its design. Our cozy dwelling features a 12-foot squared interior and proves that comfort doesn’t depend on size. This piece explains the butt-and-pass method to build your log cabin. You’ll learn about selecting the right logs (ideally with diameters of at least 6 in) and creating solid foundations approximately 12 in deep. Your dream of a weekend retreat or permanent residence can become reality without specialized equipment or extensive construction experience.
Planning Your Log Cabin Build
Your log cabin project’s success starts well before cutting the first log. Good planning is the life-blood of a fun building experience and helps you dodge mistakes that can get pricey later.
Choosing the right location
You’ll need to think about several factors when picking the perfect spot for your log cabin. Start with how easy it is to reach essential services. How close do you want grocery stores, medical facilities, or schools? The best spots give you privacy but keep you close enough to what you need.
The land itself matters too. Rocky soil can make excavation costs jump by a lot, and very wet ground might limit where you can build because of drainage problems. Take time to visit possible sites during different parts of the day and seasons. This helps you understand how sunlight, wildlife, and weather changes might shape your daily life.
Before buying land, break down local zoning laws and building regulations for log structures. Some places have specific rules about log home construction that affect your plans. Getting permits early makes the whole building process smoother and helps you avoid regulatory surprises.
Designing a simple and functional layout
If you’re building for the first time, keep things simple. A straightforward floor plan with a rectangular shape works best. Each extra corner or bump-out adds more work and cost to your project.
Think about how you’ll use your cabin—will it be a weekend getaway or your main home? Your answer shapes all your design choices. Smaller cabins work well with open floor plans that combine kitchen, dining, and living areas. Log cabins usually range from snug one-bedroom designs around 500 square feet to roomy three-bedroom layouts around 1800 square feet.
The way you face your cabin makes a big difference. Windows should capture natural light and great views. On top of that, the right orientation helps with passive solar heating, which cuts down energy costs over time.
Estimating your budget and timeline
You need realistic cost expectations. A milled log home package runs about $45-$65 per square foot. The total build typically costs $175-$200 per square foot for milled log homes with standard finishes.
Site preparation takes a big chunk of your starting budget. Land clearing averages around $3,400 for a typical home site, or $250-$2,800 per acre depending on tree coverage. Foundation costs change based on type – simple concrete slabs cost $4-$14 per square foot, while full basements run $10-$25 per square foot.
Plan for about a year from start to finish. Here’s how it breaks down:
- 1-3 months to finalize design
- 2-4 months for permits and site prep
- 2-4 months to construct the package
- 3-9 months for finishing work
Gathering basic hand tools
DIY builders should invest in quality tools. A full set of log cabin building tools costs between $2,500-$3,500 new. You might find good deals on online marketplaces for used tools.
You’ll need these essential hand tools:
- Measuring and marking tools
- Peeling spuds and drawknives
- Axes and adzes
- Chainsaws and chisels
- Levels and squares
- Hammers and mallets
- Drills and augers
Good tools are worth the investment – they make work easier and give better results. Plus, you’ll keep using these tools for cabin maintenance and improvements down the road.
Sourcing and Preparing Materials
The materials you choose will affect your log cabin’s durability, looks, and cost. Getting this significant step right saves time and money throughout your building experience.
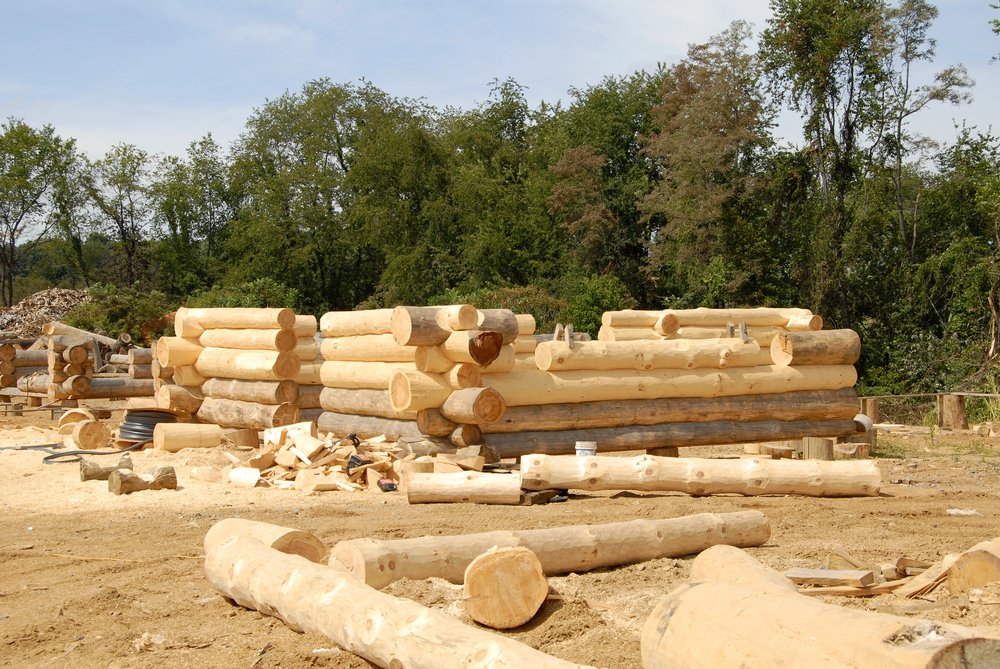
Selecting the right trees for logs
Trees growing at higher altitudes make the best logs for cabin construction. These slow-growing specimens develop tight growth rings and create dense wood that won’t crack or check as easily when it dries. You can spot tight growth rings by looking at a cut log’s cross-section—each circular line shows one year of growth.
The best time to harvest trees is winter because sap content hits its lowest point. This reduces checking and mold growth. DIY builders should look for straight trees that don’t taper much—a sixteen-foot log should taper no more than 2 inches.
Pine is the most affordable option and you can find it almost anywhere in North America. Cedar might be worth the extra money if you’re building where it rains a lot or humidity runs high. Cedar’s natural oils fight off decay and insects, so you won’t need chemical treatments.
Log diameter matters: Standard cabins need logs between 8-10 inches in diameter. Foundation sill logs should be bigger—at least 12 inches in diameter to support everything properly.
Cutting and peeling logs
Safety gear comes first when you’re harvesting logs. You’ll need a helmet with face protection, safety glasses, kevlar leg protection, and steel-toe boots. Don’t cut trees on windy days—they might fall unpredictably.
Peeling bark helps your cabin last longer. As one expert puts it, “Bark provides both a home for damaging insects and a place for moisture to collect, which can ended up leading to rot”. The timing of this job makes a big difference in how hard it is:
Spring-cut trees peel easily because the cambium layer under the bark stays soft and slippery during growing season. The bark becomes almost impossible to remove by autumn because it sticks to the wood like glue.
A bark spud works best for spring-peeled logs—it’s just a long, curved metal blade on a wooden handle. Make a “zipper” with an ax by scoring lightly along the log’s length. Then put the spud perpendicular to the log and push the handle to pry bark away. Tough bark needs a drawknife, but that takes way more time.
Let logs dry for 1-2 years naturally or speed things up with kiln-drying. Seal the ends with paraffin wax, polyurethane, or special sealants to stop moisture loss that causes cracking.
Transporting logs to the site
Moving heavy logs needs smart thinking rather than muscle. Make use of leverage with tools like cant hooks or peaveys to roll logs instead of lifting them. A gas-powered capstan winch costs more but really helps with bigger logs.
Simple iron wheels and ropes might do the job for downhill transport. Winter building has its perks—hard, icy ground makes sliding logs much easier.
Remember to add transportation costs to your budget if you’re getting logs from far away. Local materials usually cost less unless you need specific non-native wood types.
Using salvaged or local materials
Local materials cut down on environmental impact and costs. Using timber from your region reduces transportation emissions while supporting local businesses and forest management.
Budget-conscious builders might want to check out salvaged materials. Old log cabins, timber-frame barns, and similar structures often have useful pieces like hand-hewn logs, lumber beams, antique flooring, and architectural elements.
Some builders create cabins using only fallen trees. This approach takes more work but leaves a smaller environmental footprint and gives the finished cabin unique character.
Check salvaged logs carefully for insect damage, rot, or too much weathering. Old logs might not insulate as well or last as long as fresh timber, even with new sealant.
Building the Foundation and Floor
Your log cabin project needs a solid foundation that serves as the base. This ensures stability and durability whatever the terrain or climate conditions.
Creating stone or concrete piers
Concrete piers work great as foundation solutions for log cabins, especially when you have uneven terrain. These cylindrical supports transfer the cabin’s weight to solid ground and lift the structure above soil moisture. The elevation creates a natural buffer against dampness that could damage your lower logs.
Log cabins used many types of foundations in the past. These included flat stones with or without mortar, rubblestone piers, or horizontal log “sleepers” placed right on grade. Stone piers became popular for permanent structures because they let air flow beneath the sill logs. This airflow was crucial in warm, humid climates where wood decays faster.
Modern pier foundations usually go 3-4 feet deep, based on your local frost line. Piers are better than full concrete foundations in several ways:
- Perfect for sloped lots without much digging
- Easy access to electrical and plumbing systems
- Lower risk of termite problems compared to ground contact
- Cost less than full basement or crawl space foundations
Laying sill logs for stability
Sill logs (or mud sills) sit right on your foundation and support your entire cabin. Most builders recommend pressure-treated 2×8 lumber for this crucial part.
You should put foam sill sealer between concrete and wood before placing sill logs. This prevents moisture transfer and keeps insects out. This small step adds years to your cabin’s life.
The sill logs must be level—within 1/8 inch works best. Any small error now will create bigger problems as you build up.
Installing floor joists
Floor joists create your cabin’s structural floor frame. Place these support beams 16 inches apart for the best strength while saving on materials. You’ll need extra struts and pillars for support if spans go beyond 7 feet.
Old-style cabins used notched joists that fit right into sill logs, creating friction for stability. Today’s builders often use 2×8 floor joists placed perpendicular to sill logs.
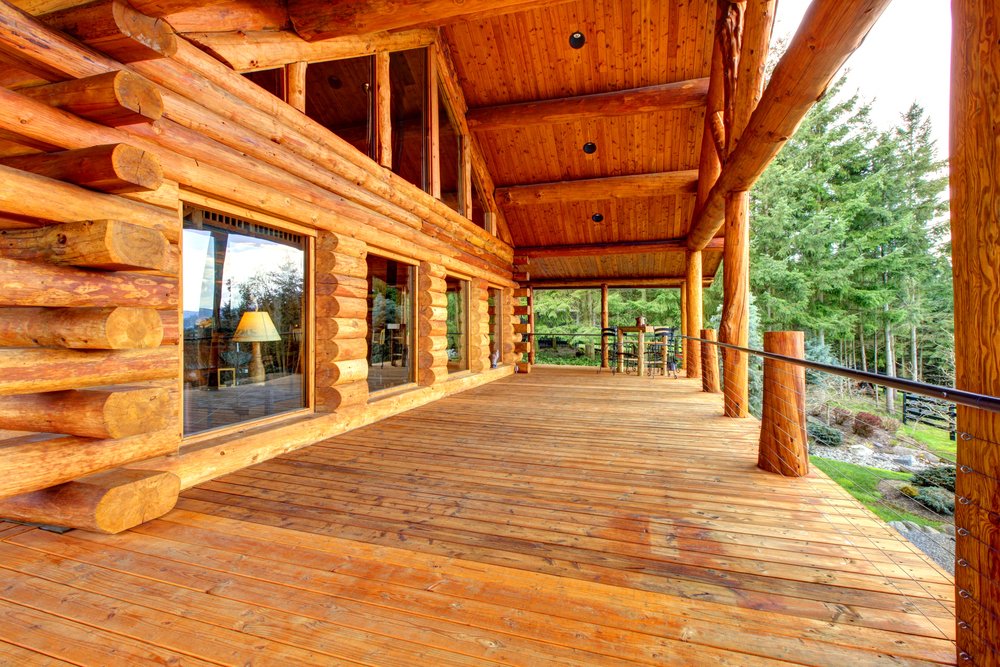
Using reclaimed wood for flooring
Reclaimed wood floors add character and help the environment. Wide-plank pine and oak work really well in log cabins. White oak is by far the most durable and resists water naturally.
Reclaimed wood comes with natural marks that hide daily wear and tear. The weathered look gets better with age and creates an authentic feel you can’t get with new materials. This wood brings real history into your cabin – some floors come from buildings over 100 years old.
Let reclaimed wood adapt to your cabin’s conditions for 2-3 weeks before installation. Then apply proper sealants – several coats of satin-finish polyurethane protect the wood without making it too shiny.
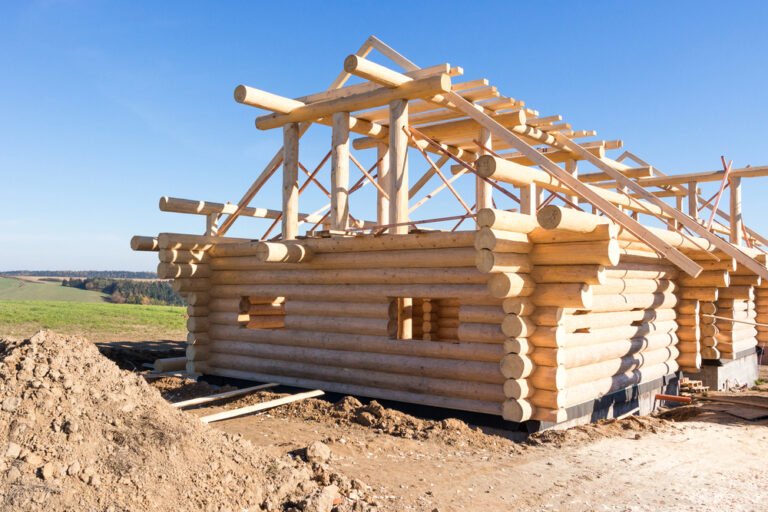
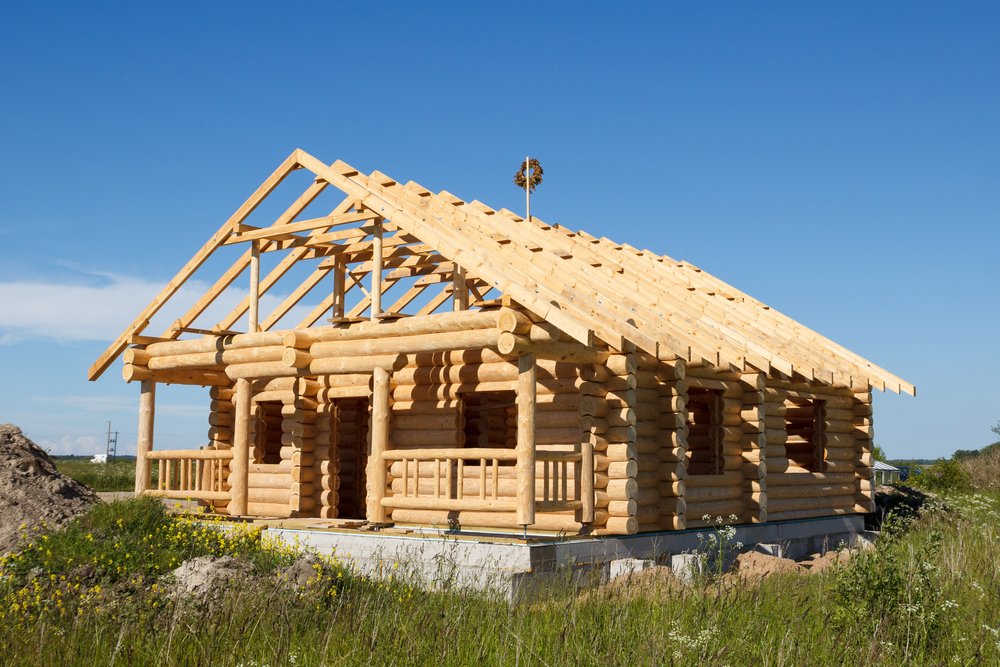
Constructing the Walls and Roof
Your log cabin starts taking shape during the wall-raising phase. This crucial stage turns a basic foundation into a real structure through skilled craftsmanship.
Notching and stacking logs
Secure, weathertight corners come from proper notching. The saddle notch works best for beginners – you just carve a curved depression in each log’s bottom to fit onto the round log below. Dovetail notches give you better strength but you’ll just need more skill to make them.
The largest logs (8-10 inches diameter) should sit on your foundation first to keep moisture away. The walls get trickier to fit as you stack them higher because small irregularities add up.
Labeling logs for order
A good labeling system saves you from major headaches later. Aluminum tags with stamped numbers work great when secured to each log end. Number your logs from bottom to top and sketch out where each log goes to make reassembly easier.
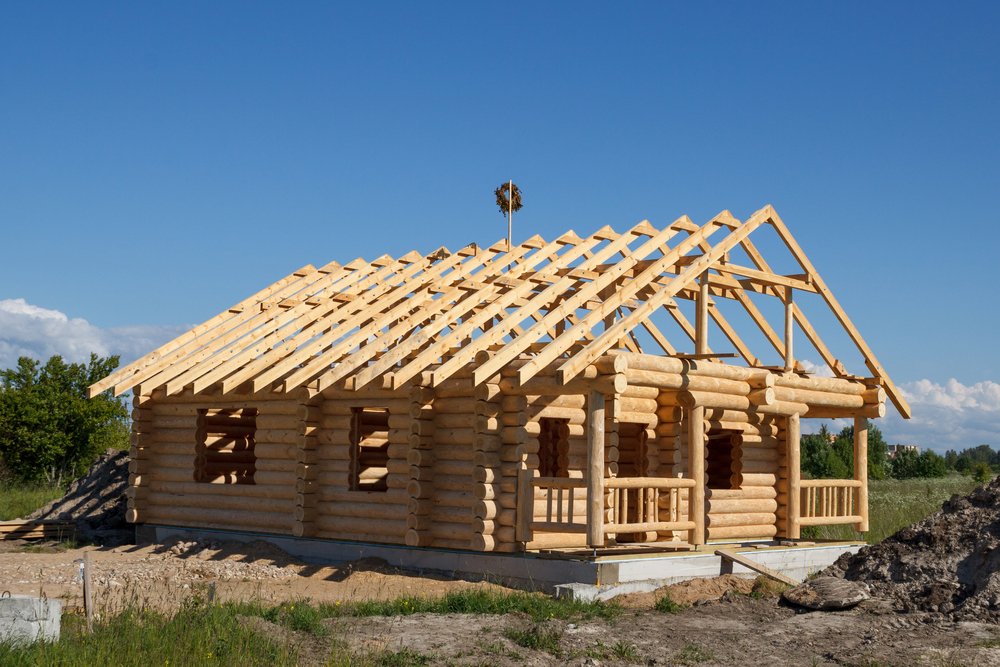
Building gables and loft
After your walls reach the right height, it’s time to build those triangular gable ends that hold up your roof. Steeper gables help water run off better and make your roof last longer. You can frame the loft space under the roof peak for extra sleeping areas at the same time.
Installing purlins and rafters
Your roof structure needs purlins (horizontal beams) and rafters. Start by placing the ridge pole at the peak, then add supporting purlins below. Every measurement must be exact – even tiny gaps can cause big problems down the road.
Making and placing cedar shakes
Cedar shakes make a traditional roof when installed in overlapping courses. Put down a starter course at the bottom edge first, then work your way up. Each new course should cover the one below it. Leave a quarter-inch gap between shakes so they can expand.
Final Touches and Weatherproofing
A properly weatherproofed log cabin becomes a cozy, functional home rather than a simple structure. The finishing touches make it look better and last longer.
Installing doors and windows
Good sealing around doors and windows cuts down air leaks and heat loss in your log cabin. Energy-efficient windows with high insulation ratings work best. Heavy insulating curtains can improve thermal performance. Your south-facing windows can use natural sunlight for warmth. Quality weatherstripping and the right caulking around openings keep drafts and moisture out.
Chinking gaps between logs
Sealing gaps between logs through chinking needs ongoing maintenance. Caulk works well for gaps under ¾ inch, while bigger spaces need proper chinking material. Put backer rod in the gaps first, then apply chinking with enough pressure to touch the inner log surfaces. Your cabin’s logs will expand and contract as they age. This means you might need to reapply chinking to keep everything weathertight.
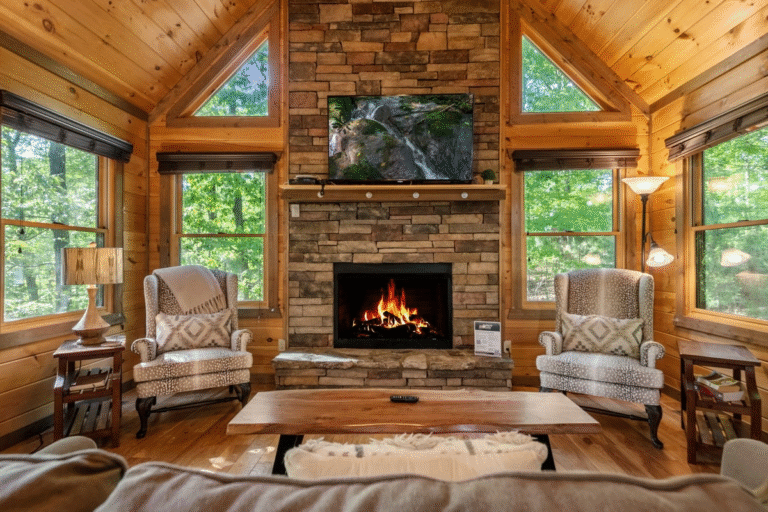
Adding a wood stove for heat
Wood-burning stoves give off good heat locally and add rustic charm. They are a great heating option for cabins with plenty of wood nearby. Pick a smaller stove with the right BTU output for your cabin size – you need about 20 BTUs per square foot of heating area. Safety is crucial, so professional installation by a HETAS engineer is recommended.
Setting up basic utilities
Basic utility systems are needed even in off-grid cabins. Utilities get installed after the exterior walls are done in log construction. Nonmetallic cables run from the main service panel to outlets, switches, and appliances for electrical wiring. Plumbing involves underground connections and rough-in pipe installation before placing fixtures. Composting toilets can be practical for remote locations.
Conclusion
Building your own log cabin is a challenging but deeply rewarding experience. You’ll develop practical skills and create a tailored woodland retreat that fits your needs perfectly. Our small cabin cost around $3000 since we used trees from our own land, though your costs will vary based on materials and location.
New builders should keep things simple. A basic rectangular design with fewer corners makes construction by a lot easier. The right trees make all the difference – look for straight ones with tight growth rings. Winter harvesting works best when sap levels are lowest.
Your foundation supports everything above it. Extra time spent on level sill logs will pay off as your build progresses. Small mistakes at the start become bigger problems as walls get higher.
Most people think they need special equipment and years of construction experience to build a cabin. This isn’t true for small to medium-sized projects. Simple hand tools, good planning, and determination matter more than expensive machinery or professional credentials.
Weather is a vital part of your building timeline, so staying flexible helps you deal with delays from rain or snow. Each completed phase brings satisfaction – from peeling that first log to starting the first fire in your wood stove – making weather challenges worth it.
Log cabins remind us of simpler times while giving us practical, energy-efficient shelter. Your cabin could start as a weekend getaway and become a permanent home or family legacy. Whatever your goals, the skills you learn from this building process help with many other projects.
Take time to learn, welcome the challenges, and enjoy building something that lasts generations. Nothing beats the pride of showing off your beautiful woodland home and saying, “We built that ourselves.”
FAQs
Q1. How much does it typically cost to build a log cabin? The cost of building a log cabin varies widely depending on materials, size, and location. For a milled log home, budget around $45-$65 per square foot for the log package alone. Total construction costs generally range from $175-$200 per square foot for modest finishes. However, DIY builders using their own timber can significantly reduce costs.
Q2. What are the essential tools needed for building a log cabin? Essential tools for log cabin construction include measuring and marking tools, peeling spuds, drawknives, axes, chainsaws, chisels, levels, squares, hammers, mallets, drills, and augers. A complete set of quality tools typically costs between $2,500-$3,500 new, but second-hand options can reduce this cost.
Q3. How long does it take to build a log cabin? On average, it takes about a year from initial planning to completion of a log cabin. This timeline includes 1-3 months for design, 2-4 months for permits and site preparation, 2-4 months for package construction, and 3-9 months for finishing work. However, the actual time can vary based on the cabin’s size, complexity, and the builder’s experience.
Q4. What type of wood is best for log cabin construction? Pine is the most budget-friendly and widely available option for log cabins. However, cedar is excellent for areas with high rainfall or humidity due to its natural resistance to decay and insects. When selecting trees, look for straight specimens with minimal tapering and tight growth rings, ideally harvested in winter when sap content is lowest.
Q5. How do you weatherproof a log cabin? Weatherproofing a log cabin involves several steps. Properly chink gaps between logs using caulk for small spaces and specialized chinking material for larger gaps. Install energy-efficient windows and doors with proper sealing and weatherstripping. Apply appropriate sealants to the logs to protect against moisture and UV damage. Regular maintenance, including re-application of chinking and sealants, is crucial for long-term weatherproofing.